Full, well-defined eyebrows have become a beauty staple, framing the face and adding structure to your overall look.
However, not everyone is blessed with naturally thick brows. Whether due to over-plucking, aging, or genetics, sparse eyebrows can be a source of frustration for many.
Thankfully, achieving fuller brows using a pencil is a simple and effective technique that can transform your appearance.
How to Achieve Fuller Brows Using a Pencil
With the right tools and techniques, you can create the illusion of thicker, more voluminous eyebrows.
A good eyebrow pencil is a versatile tool that can help you fill in gaps, define your shape, and enhance the natural beauty of your brows.
In this guide, we’ll walk you through the steps to achieve fuller brows using a pencil, ensuring a natural and polished finish.
Step 1: Choose the Right Pencil
The first step to achieving fuller brows using a pencil is selecting the right product. Look for an eyebrow pencil that matches your natural brow color or is one shade lighter.
This ensures a natural look and prevents your brows from appearing too harsh or artificial.
Pencils with a fine tip allow for precise application, mimicking the appearance of natural brow hairs.
Additionally, consider a pencil with a spoolie brush on one end, which helps blend the product and groom your brows.
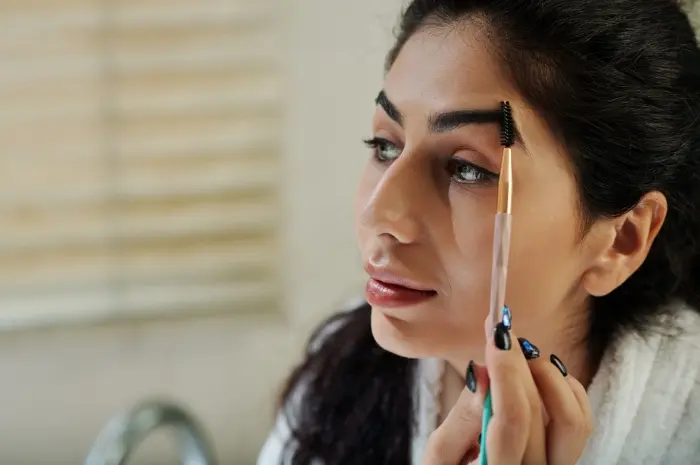
Step 2: Prepare Your Brows
Before applying the pencil, make sure your brows are clean and dry. Use the spoolie brush to comb your eyebrows upward and outward, following the natural direction of hair growth.
This step helps reveal the natural shape of your brows and identifies any sparse areas that need filling.
If necessary, trim any excessively long hairs with small scissors to maintain a tidy appearance.
Step 3: Outline Your Brows
To achieve fuller brows using a pencil, start by outlining the shape of your eyebrows.
Use light, feathery strokes to draw a line along the bottom edge of your brow, following its natural curve.
Repeat this along the top edge, creating a defined shape. Focus on enhancing the arch and extending the tail slightly for a lifted, elongated look.
Remember to use a light hand to avoid harsh lines.
Step 4: Fill in Sparse Areas

Once you’ve outlined your brows, it’s time to fill in the sparse areas. Use the same light, feathery strokes to mimic natural brow hairs.
Start at the inner corner of your brow and work outward, gradually building up color and density.
Pay special attention to any gaps or thin spots, but avoid overfilling to maintain a natural look.
The goal is to create the illusion of more hairs, not a solid block of color.
Step 5: Blend and Set
After filling in your brows, use the spoolie brush to blend the pencil strokes and soften any harsh lines.
Brush through your brows in an upward and outward motion, distributing the product evenly and creating a more natural appearance.
If desired, you can set your brows with a clear or tinted brow gel to keep them in place throughout the day.
This step adds extra definition and ensures your fuller brows last longer.
Step 6: Highlight the Brow Bone
For an added touch of polish, highlight the brow bone just below your eyebrows.
Use a highlighter pencil or a light, shimmery eyeshadow to accentuate the area under the arch.
This step creates a subtle lift and draws attention to your beautifully defined brows.
Conclusion
Achieving fuller brows using a pencil is a straightforward and effective technique that can enhance your natural beauty.
By choosing the right pencil, outlining your brows, filling in sparse areas, blending, and setting, you can create well-defined, voluminous eyebrows that frame your face perfectly.
With a little practice and the right products, you’ll master the art of fuller brows and enjoy a polished, sophisticated look every day.